There are several factors that could cause your eSIM to show a connection to the network while failing to provide Internet access on a 4G LTE or 5G network.
You might encounter the following issues when your eSIM isn’t connected to a data network:
- Significantly reduced download and upload speeds
- Only “E” (Edge) is displayed in the signal status, with no indication of 4G LTE or 5G
- An Internet connection is unavailable despite the eSIM appearing to be connected
To address these problems, please follow these troubleshooting steps:
IMPORTANT: DO NOT DELETE THE eSIM FROM YOUR PHONE! If it’s not working, don’t worry, please follow the steps below or Contact Us if you need assistance.
1. Are you in the eSIM service area?
Please be aware that your eSIM will function only in the location where it was purchased. For instance, a USA eSIM will only connect while you are in the USA. You can install the eSIM on your device at any time, but it will not establish a network connection until you reach your destination.
2. Turn on Roaming Data
Roaming Data must be enabled for the eSIM to connect to a network.
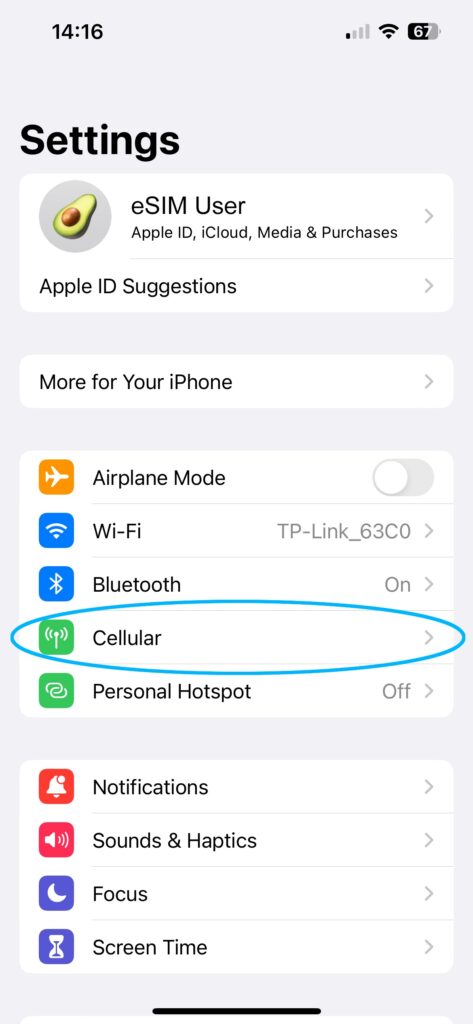
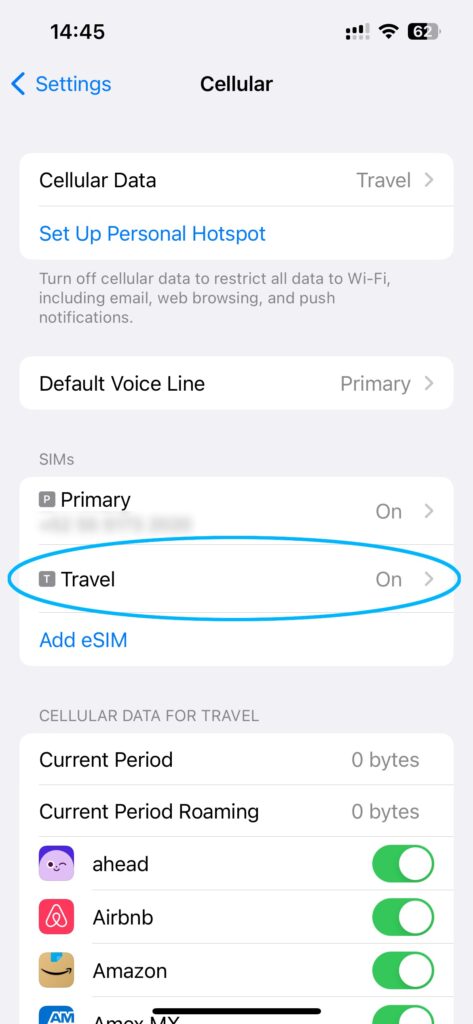
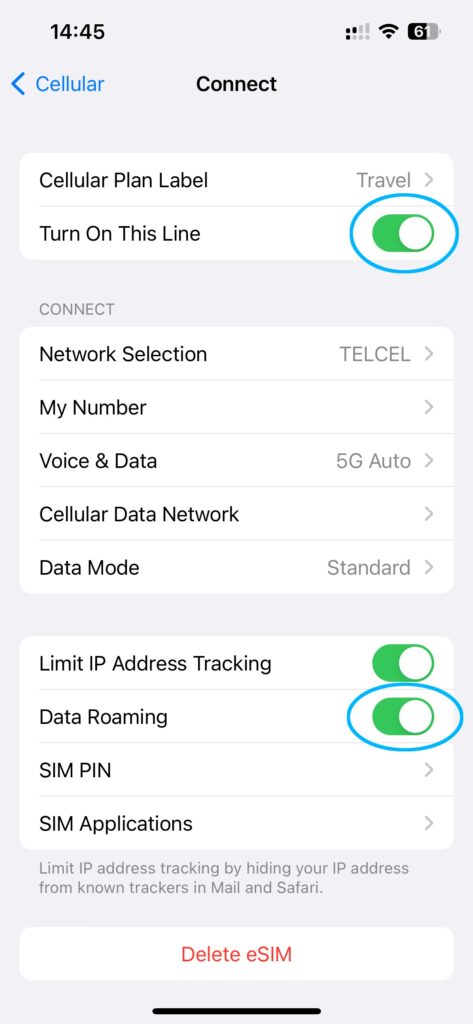
iPhone / iPad (iOS)
- In your phone’s Settings, go to Cellular and select the eSIM data plan under Cellular Plans. The eSIM plan may be called “Secondary” or “Personal.”
- Make sure Turn On This Line is set to ON.
- Make sure Roaming Data is set to ON.
Samsung Galaxy (Android)
- Open Settings and go to Connections
- Tap on Mobile Networks
- Confirm Data Roaming is ON
Google Pixel (Android)
- Open Settings
- Tap Network and Internet
- Tap on SIMs, and on the following page, select the eSIM plan.
- Enable Data Roaming and Mobile Data.
3. Set your phone to use the eSIM for mobile data
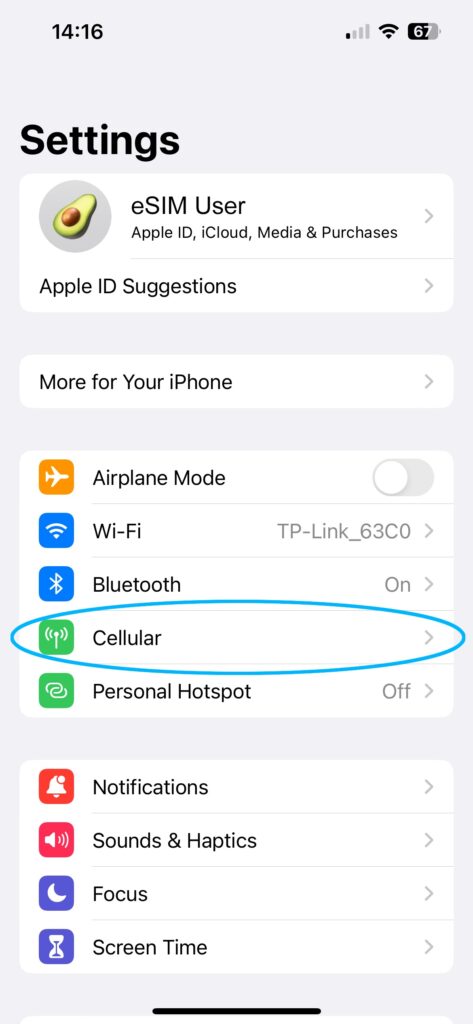
Apple iOS (iPhone)
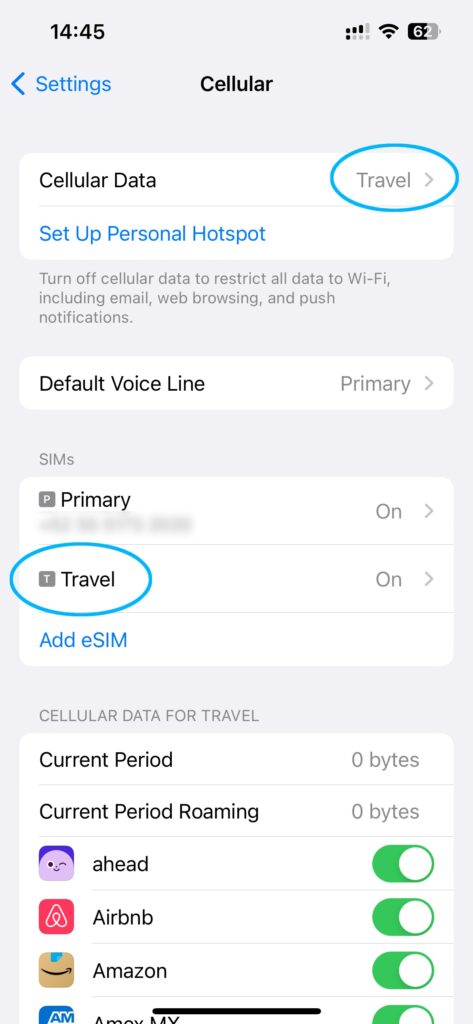
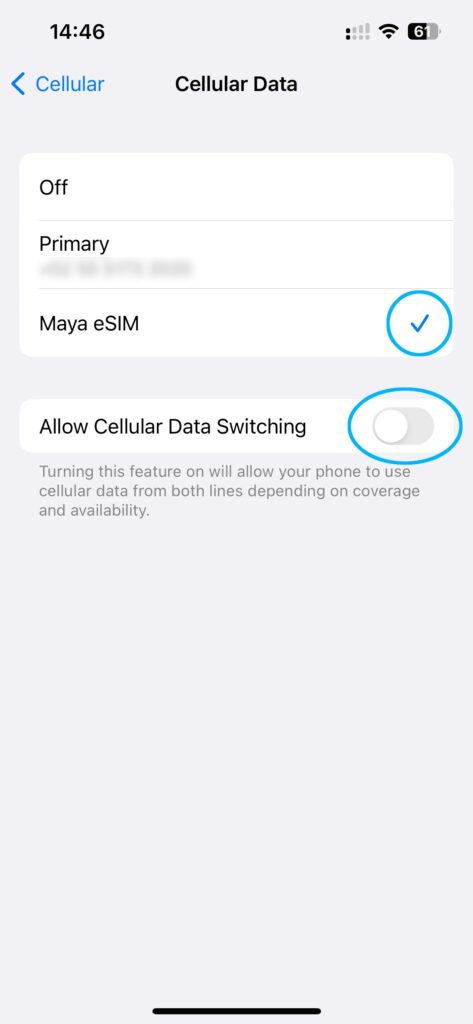
- In your phone’s Settings, go to Cellular
- Tap Cellular Data at the top to enter a menu where you can select the data plan to use
- Note: It may be called “Mobile Service” or something else on your device.
- Make sure the eSIM is selected. It may be called “Secondary” or “Personal.” In the example above, it’s called “Maya eSIM”, but it will have the same name as the plan on the previous screen (Travel).
Samsung Galaxy (Android)
- Open Settings and go to Connections
- Tap SIM Card Manager at the top, and on the following page select the eSIM plan for Mobile Data. This will tell the phone to use the eSIM plan for data connections.
Google Pixel (Android)
- Open Settings
- Tap Network and Internet
- Tap on SIMs, and on the following page, select the eSIM plan.
4. Android Only – Configure APN
If you are using an eSIM on an Android device and there is no data connection, please check the APN settings by following the steps below:
- In your phone’s Settings, go to Mobile & Network (On Samsung, go to Settings > Connections > Mobile Networks)
- Tap the eSIM plan, then go to Access Point Names
- Tap Menu, then tap New APN
- In the first field called APN, enter globaldata. If there is anything filled in username or password, delete it. Only the APN name is required.
- Return to the previous screen and select the new APN.
5. Reset the data connection
In the Settings menu of your device, turn on Airplane Mode and wait for 30 seconds before turning it off again. This action will prompt your device to reconnect to the cellular network. Allow up to 15 minutes for the eSIM data plan to authenticate successfully and start receiving 4G LTE or 5G data.
6. Manually select a network
If resetting the data connection does not work, you may need to select a network manually. Follow the steps below:
Apple iOS (iPhone)
- Open Settings
- Go to Cellular and select the eSIM data plan under Cellular Plans
- Tap Network Selection, and on the following screen, switch Automatic to Off. Wait for the list of available networks to appear.
- Manually select an available network, and wait for the signal status to update. You should see the signal status in the top bar switch to “Searching” when you select a new network.
- After finding a network that connects, toggle Automatic back to On.
Please feel free to contact us if you need to manually select a network, so we can tell you which networks are the best to connect to.
Still no data connection
Please >Submit a request, and we will get right back to you!
If you’ve confirmed that the steps above haven’t resolved the issue, it’s possible that you’re in an area without coverage, or there may be a network issue beyond our control impacting service.
The best course of action is to wait and check again later. Keep the Network Selection set to Automatic so that your device can continue searching for a signal.
